If you’ve ever created a learning course in Articulate Storyline or Adobe Captivate, you have most certainly seen (and probably used) a progress bar that appears below the slide by default in both of these authoring tools. Unfortunately, this default progress bar does not always meet the unique needs of the particular elearning project, and developers often have a need for a custom progress bar that can be created of the authoring tool and added to the module. Until recently, there weren’t too many external tools that helped to create a custom progress bar from scratch, let alone easily add it to your elearning module in Articulate Storyline or Adobe Captivate. Recently, however, Cluelabs introduced a Progress Bar Widget that makes it extremely easy to add a custom progress bar to a learning course.
Here are some things that you can do with the Progress Bar Widget (things that aren’t possible with the standard tools in Storyline and Captivate):
- Place the progress bar anywhere on the slide
- Customize the look of the progress bar beyond just a fill color
- Make the progress bar any height and width
- Style it to match your project’s visual theme
- Hide and show the bar using the actions and triggers in the learning module
- Adjust the progress display by using variables
- Display course progress instead of slide progress (Storyline)
Elevate Your Articulate Storyline Expertise!
These free tutorials will give you the top skills to stand out in the crowded e-learning development field.
Below you can find a quick guide on creating a custom progress bar for your learning course and adding it to the Articulate Storyline or Adobe Captivate project.
Creating a New Progress Bar
Note that these initial steps are the same for both authoring tools discussed here.
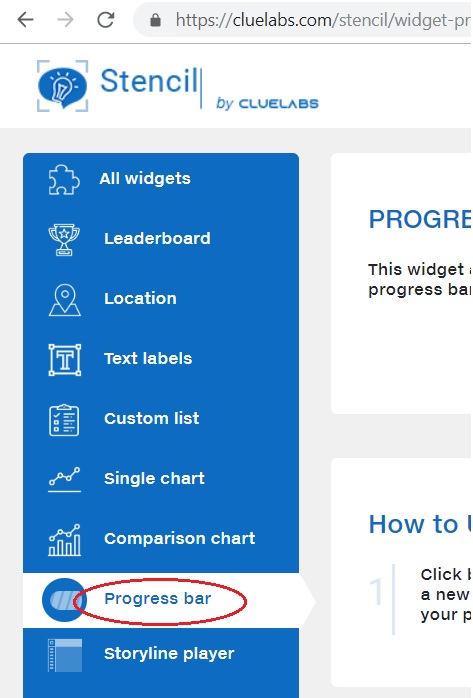
Step 1
Select “Progress Bar” from the list of widgets in the Stencil editor on Cluelabs.com.
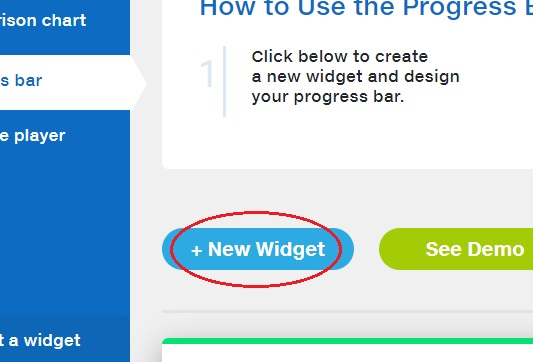
Step 2
Select “+ New Widget” to create a new widget for your elearning course.
Step 3
Enter widget details and select the type of the progress bar you will use.

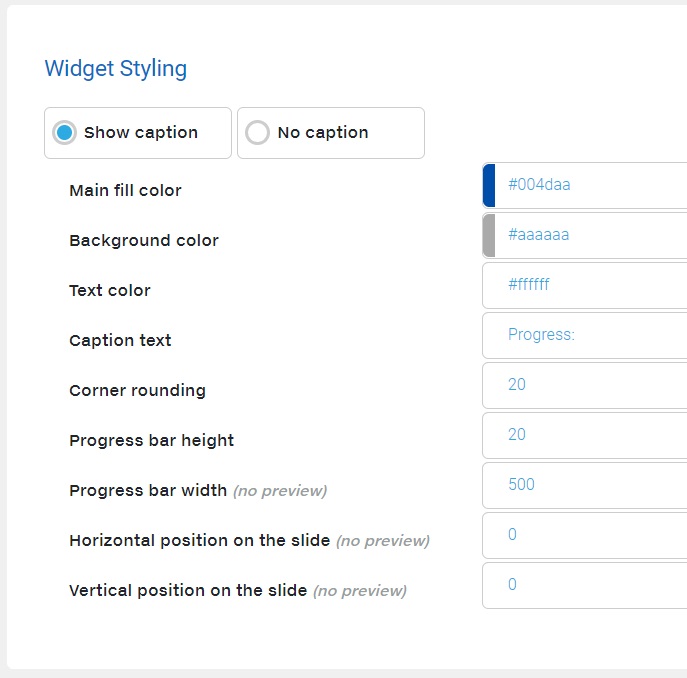
Step 4
Style your widget by selecting the colors, dimensions, position, etc.
Adding the Progress Bar to a Course in Articulate Storyline
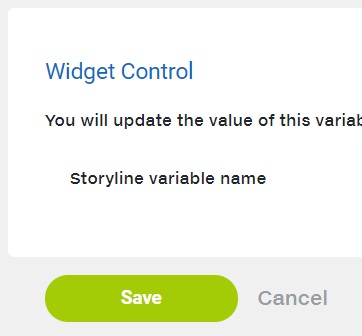
Step 5
Enter the name of the variable that will control the progress bar in Storyline and click “Save.”
Step 6
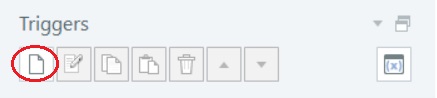
Go to the Master Slide and create a new trigger.
Step 7
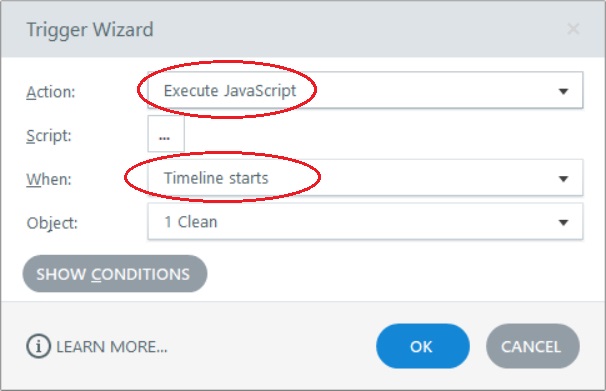
Select “Execute JavaScript” when timeline starts.
Step 8
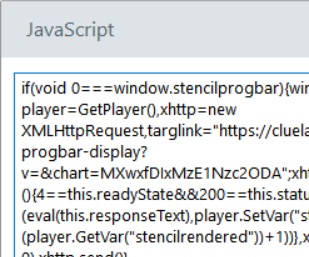
Paste the trigger code you were provided when you saved the widget in Stencil editor.
Step 9
Have fun with your progress bar!
Adding the Progress Bar to a Course in Adobe Captivate
Step 5
Click “Save” to save your widget.
Step 6
On the first slide in the project, in slide properties click on the slide start actions drop-down and select “Execute JavaScript” from the list.
Step 7
Paste the action code you were provided when you saved the widget in Stencil editor.
Step 8
Have fun with your progress bar!
Changing the Progress Bar Value
Create a new JavaScript trigger (Storyline) or action (Captivate), paste the following line of code into the script window (replace “number” with a number from 0 to 100):
setProgress(number);
Hiding the Progress Bar
Create a new JavaScript trigger (Storyline) or action (Captivate), paste the following line of code into the script window:
hideProgress();
Showing the Progress Bar
Create a new JavaScript trigger (Storyline) or action (Captivate), paste the following line of code into the script window:
showProgress();
Whether you are creating a learning game, a compliance elearning course, a microlearning module, or a customer service learning course, in most cases you will want your learners to be able to see a visual indication of their progress within the course. The Progress Bar widget by Cluelabs comes in handy in situations like this, especially if you are not happy with the generic progress display options available in Articulate Storyline and Adobe Captivate.
– Place the progress bar anywhere on the slide
– Customize the look of the progress bar beyond just a fill color
– Make the progress bar any height and width
– Style it to match your project’s visual theme
– Hide and show the bar using the actions and triggers in the learning module
– Adjust the progress display by using variables
– Display course progress instead of slide progress (Storyline)
1. Select “Progress Bar” from the list of widgets in the Stencil editor on Cluelabs.com.
2. Select “+ New Widget” to create a new widget for your eLearning course.
3. Enter widget details and select the type of progress bar that you will use.
4. Style your widget by selecting the colors, dimensions, position, etc.
Create a new JavaScript trigger (Storyline) or action (Captivate), then paste the setProgress(number); code into the script window (replace “number” with a number from 0 to 100)
Create a new JavaScript trigger (Storyline) or action (Captivate), then paste hideProgress(); or showProgress(); code into the script window.